Call us for a free home assessment 0800 140 150
Replacing the battery of your SmartVent wireless humidity sensor is easy! The original battery provided with sensors is expected to last at least two years.
Here is a step by step guide on how to remove and change the battery:
Step 1:
Turn the unit counter-clockwise gently. The lid should separate from the unit with an audible click.The battery compartment lid will remain adhered to the wall/ceiling.

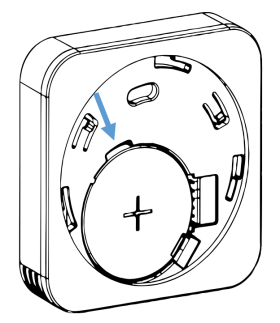
Step 2:
Leverage the CR2032 coin cell from the compartment using a small tool as shown in image.

Step 3:
Press the small button on the underside of the sensor three times to discharge any residual voltage.
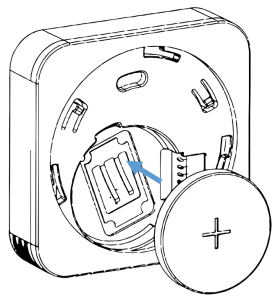
Step 4:
Then insert the replacement battery back into the compartment.
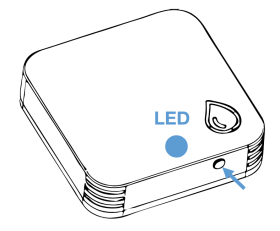
Step 5:
Wait at least 3sec. Press the small button on the underside of the unit and observe the LED should flash once.(if it doesn't, consult your user manual's troubleshooting guide)

Step 6:
Replace the unit back onto the battery compartment lid. Note: Alignment guide must be inserted into the alignment slot when putting the battery cover on.
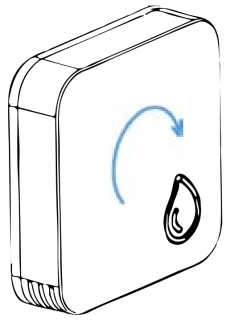
Step 7:
Turn the unit clockwise gently. Locking the unit on the lid.
If you need additional help, please consult your relevant user manual (find here), or give our support team a call at 0800 140 150.